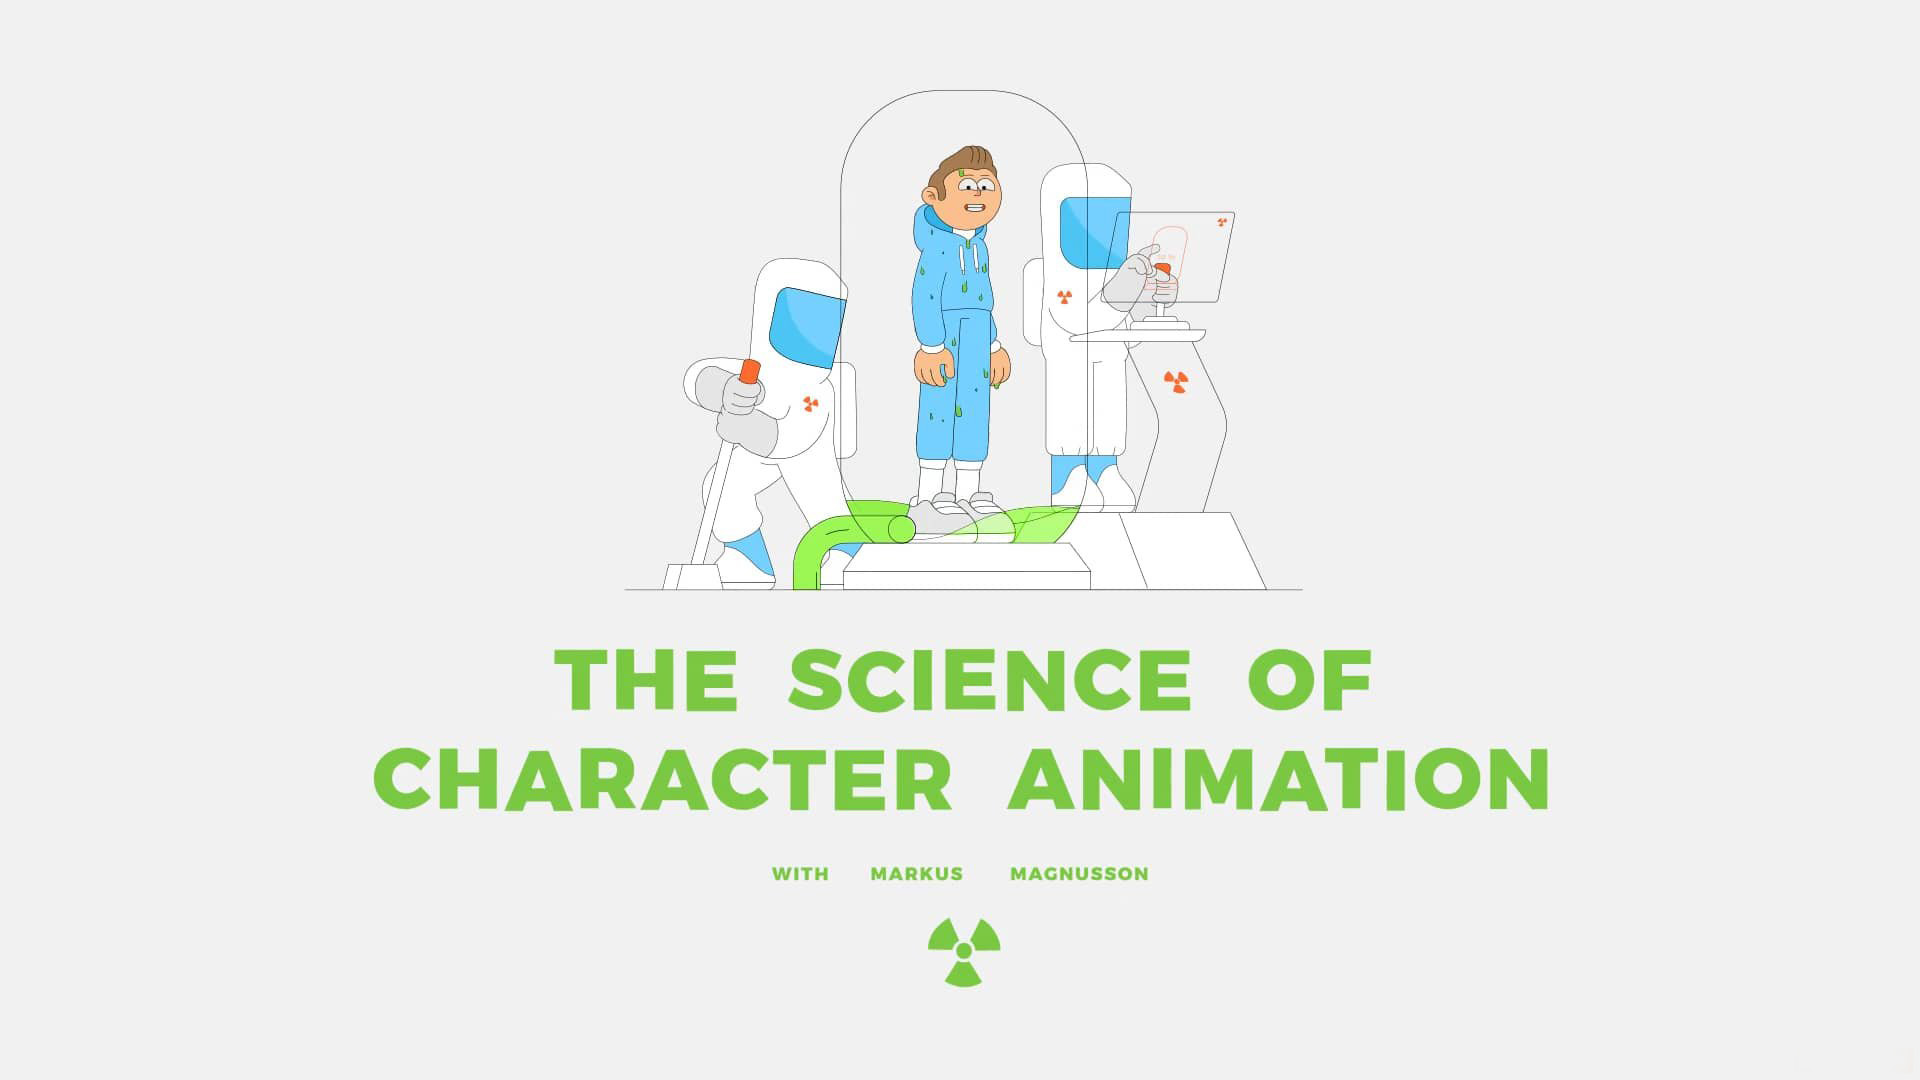
آموزش پایه طراحی، ریگ بندی و انیمیت کاراکتر با ایلاستریتور و افترافکت
فایل آموزشی بروز رسانی شد و تمامی پارت های آموزش در این نسخه قرار دارند.
با استفاده از این دوره آموزشی که توسط وب سایت مدرسه موشن گرافیک ساخته شده است می توانید تا حد ممکن اصول و تکنیک های طراحی کاراکتر های دو بعدی و همچنین انیمیت کاراکترها را فرا گیرید.
در این آموزش سعی شده است تا به شما ساده ترین و حرفه ای ترین روش ها را برای طراحی کاراکتر با استفاده از نرم افزار ایلاستریتور و همچنین ریگ بندی و انیمیت کاراکتر را با استفاده از نرم افزار افترافکت آموزش دهیم .
در این مجموعه آموزشی همچنین برای ریگ بندی کاراکتر از اسکریپن CHARACTER TOOL استفاده شده است که به شما کمک زیادی خواهد کرد و در انتهای آموزش نحوه استفاده از آن را فرا خواهید گرفت.
Lessons:
1. Character Design. Part 1 (Adobe Illustrator)
Work on character animation starts with the character. For this reason, Markus will pay great attention to how really charismatic characters are created.
You will have a quick overview of Adobe Illustrator tools and then learn about blocking out a character, proportions, exaggerations and etc.
2. Character Design. Part 2 (Adobe Illustrator)
The author will continue talking about character design and will pay more attention to such things as hands & feet, face and hair and will finish with adding details and outlines and, of course, showing you effective ways of working with color.
3. Dynamic Character Posing (Adobe Illustrator)
Many believe that the main role in animation is played by easings and timings… But the truth is, the secret to good character animation lies in high-quality poses. So in this section you will learn what the line of action is and how to use it, how to work with weight and gravity, and how to build an expressive and balanced composition.
4. Facial expressions (Adobe Illustrator)
What emotion your character is expressing? There are a lot of small nuances in facial expressions, that’s why it is very important to know the basics of building emotions.
You will learn mouth and eyes designs and the ways to create different moods
5. Perfecting the Story (Pen & Paper)
So, let’s start animating, right? Don’t hurry… To start with you need to have everything planned thoroughly. This stage is extremely important, as it helps to avoid tricky corrections when animating and it will also save some hair on your head from falling out.
In this lesson, we will talk about ways to generate ideas, create concepts and how to turn them into a complete captivating story.
6. Setting up your animation (Adobe Illustrator + After Effects)
A character is a complex system consisting of lots of limbs and other elements. So it’s very important to secure yourself against unnecessary trouble by splitting and naming layers in Illustrator first, then import it in After Effects and create a flexible rig.That will save tons of time and make the animation process much more comfortable. This is what this lesson is about.
7. Key Animation Techniques. Part 1 (After Effects)
Alright, it’s time to animate. Markus will share with you a lot of different techniques he has learnt during his long journey as an animator. In this lesson we will talk about such principles as weight, anticipation, recoil and follow through.
8. Key Animation Techniques. Part 2 (After Effects)
After you have already got familiar with things that allow you to create the good animation basis it’s time to learn how you can add flexibility to your characters with the help of squash & stretch, whip and wave motion, and offsets.
9. Secondary Motion (After Effects)
A character consists of many details, and after main parts have been animated let’s create some secondary motion by animating clothes, hair and adding some smears or action lines to emphasize the motion.
10. Nice Walk-cycles (After Effects)
One of the greatest animators Ken Harris once gave a great piece of advice:
“ A walk is the first thing to learn. Learn walks of all kinds, cause walks are about the toughest thing to do right”.
11. Energetic Run Cycles (After Effects)
A run is not just an accelerated walk. This movement has different dynamics, that’s what we will talk about here. Markus will show you the key poses and some secret ways to make your run-cycles more expressive.
12. Pose to Pose (After Effects)
This approach will save you a lot of time while animating complex scenes with a lot of different actions. In this lesson you will learn how to plan your shot and all the further steps to achieve a really nice result instead of getting lost and spend a lot of time on experiments when animating each movement one by one.
13. Acting and Timing (After Effects)
What if your viewers were able to watch your animation only once? Would they get the message? Animation is a true stage performance, so it follows the same principles and the same tricks can be used.
Here we will talk about body language, facial expressions, importance of the eyes and, of course, timings, which usually play even greater role in achieving the best possible dramatic effect than technically challenging animation.
14. Facial Expressions & Lip Sync (After Effects)
Even the slightest brow movement can cause a significant emotional response from the audience. Would be nice
حجم فایل :2.9 گیگابایت
مطالب زیر را حتما مطالعه کنید

آموزش فتوشاپ – اضافه کردن جلوه های کارتونی به عکس

آموزش فتوشاپ تبدیل عکس به نقاشی سیاه قلم
ویژگی های تیزر تبلیغاتی موفق
سوالاتی که باید طراحان قبل از پروژه های طراحی از مشتریان بپرسند
نکات مهمی که باید در زمان ساخت موشن گرافیک به آن ها توجه کنید
آموزش فتوشاپ برای ایجاد جلوه های ویژه بر روی چهره پرتره
1 دیدگاه
اولین نفری باشید که برای این نوشته دیدگاه می نویسد.


امتیاز بینندگان:5 ستاره